Posts

Showing posts from September, 2023

Basic CPU Stress Testing On FreeBSD

Image
 FreeBSD have a basic CPU stress test application that can do the job via command line. It is usually done to monitor how stable the system configuration especially CPU overclock, how much power supply that can withstand the load from the CPU, how much temperature that can produced until reached max limit and etc. I have an old AMD FM1 platform PC equipped with AMD A6-3500 APU which overclocked into 4.0Ghz (stock speed 2.1Ghz) and this low-end AMD FM1 CPU (TDP 65w) able to overlclock such higher speeds compared to higher-end ones, AMD A8-3870K that is unable to overclock further along with ridiculously high TDP of 100w which isn't really suitable for medium-sized heatsinks, even with 3rd party ones.  In order to doing stress test and temperature monitoring, you will need to do some things: 1. Installing stress and bash program       $ pkg install stress bash 2. Creating CPU temperature script     i) Enable the CPU temperature module:  ...

Keeping the system up-to-date basics

 FreeBSD software package system is different than Linux distro and it uses 3 kinds of types to deliver software packages and updates compared to Linux distro which is usually uses one kind to deliver software packages from software installation to operating system updates. FreeBSD uses pkg for installing readily-made software, ports for compiling the program from the source with the specialized configurations and also freebsd-update to deliver operating system updates and upgrades.  1. PKG package installation system basics. In order to install/remove/modify the software in the operating system, it must be run under root privileges, otherwise for other misc. stuff eg. finding the package information. To install the package:             $ pkg install [application-name]   To remove the package:             $ pkg remove [application-name]   *To update the packa...

Setting up Sony PlayStation 1 Emulation on FreeBSD with Mednafen

Image
 Mednafen is a multi-system videogame emulator which is using only command-line as main interface rather than using graphical interface. It usually supports ranges of retro videogame console systems such as Nintendo Famicom/Super Famicom, Sony PlayStation 1, Bandai WonderSwan, Apple II etc. While it seems harder and confusing to set up due to how confusing the guide or its documentation, here I'm gonna write on how to use it, but only covers emulating Sony PS1 games for now.  1. Things what you need     i) Sony PS1 BIOS, can be obtained here.     ii) Compatible controllers eg. Sony DS4 controller    iii) Sony PS1 game ROMs. 2. Installing Mednafen. To install it, you can choose either installing it from pkg source or build it from ports collection. For ports collection, you can customize what kind of emulator that you want to be included inside Mednafen program.              $ pkg install mednafen  ...

Installing nvidia-drm-kmod on FreeBSD

Image
   The nvidia-drm-kmod is a brand new open-source driver which is a FreeBSD port of Linux's nvidia-drm.ko file that interfaces with DRM subsystem. While Intel and AMD GPU drivers have already official drm-kmod drivers, Nvidia is still stuck with proprietary drivers until the introduction of nvidia-drm-kmod. The main purpose for this driver is to make Wayland compositor to work correctly albeit there are some issues. You can install it into your FreeBSD system instead of readily-made non-DRM Nvidia drivers, however, it is still in testing stage so expect some hiccups. Note that you will need to install outside the ports collection to make it work properly. You can also install it from ports collection, however, it needs a similar setup like here. 1. Gathering the kernel source tree files and drm-kmod source file. i) Download the kernel source tree:             $ git clone https://github.com/freebsd/freebsd-src/ /usr/src ...

Setting up RetroArch in FreeBSD

Image
RetroArch is the great application for enjoying most of retro titles ranging from NES, Sega Genesis, Sony PlayStation and etc. You don't need such high-end powerful PC to enjoy it, just a PC with decent enough specifications to run it. In this guide I will show you on how to setup RetroArch properly with simple steps:    1. Install Libretro core info packages            $ pkg install libretro-core-info  NOTE: The libretro-core-info package is important to allow the RetroArch to detect the content according to the core and thus enabling to launch it. Without it, it just simply displaying "No Cores" despite installing the right core for the game content.  To install it from ports, navigate to its directory and perform install             $  pkg install  v4l_compat            $  cd /usr/ports/games/retroarch && make ...

Installing Jdownloader on FreeBSD

Image
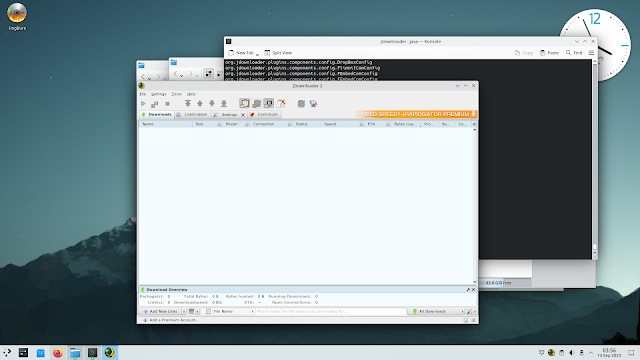
JDownloader is a magnificent tool for downloading stuffs from various websites and it uses Java and pretty much portable across platforms. This article will show you on how to setup JDownloader application for FreeBSD. 1. Install Java Runtime via OpenJDK package:                   $  pkg install openjdk17-jre   2. Download JDownloader in JAR file. It should be located under "Others" and it will redirect to its MEGA file download.  3. Make a direcotry called "JDownloader" and paste the JDownloader.jar into the directory                 $ mkdir JDownloader && mv JDownloader.jar JDownloader 4. Launch JDownloader with Java Runtime                 $ java -jar JDownloader.jar   5. You can paste the link in the JDownloader to download the c...

Setting Up GPU Cards on FreeBSD 13

Image
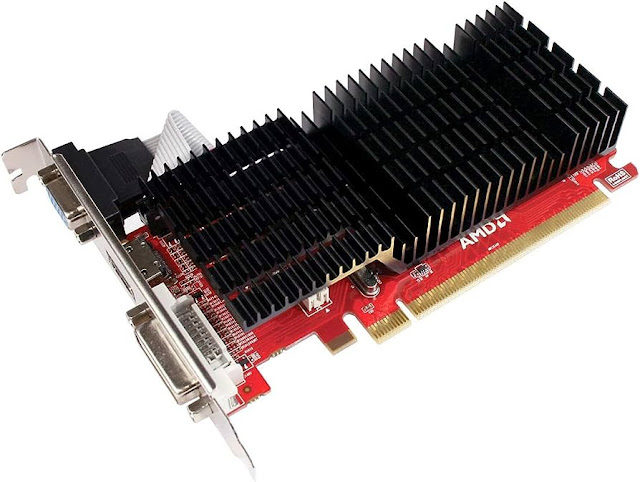
Back then, you will need to create the Xorg.conf file and write something in it just to get the GPU card working. However, for some GPU cards, things doesn't well when following the configuration guide from its official handbook doesn't work. Today, you won't need this thing anymore and you can just load it without the useless Xorg.config file.  What you only need is just load the GPU kernel modules. That's it!     1. Installing the kernel module package.       You will need these to enable your installed GPU to work with the FreeBSD 13 operating sysrtem. It can be done by 2 ways:     i) Installing the pre-built package:              $ pkg install drm-kmod     ii) Installing it from ports source:              $ cd /usr/ports/graphics-drm-kmod && make install  Note: For Nvidia GPUs, see the section "2 iii) Nvidia GPUs" below. ...

How To Setup Optical Drives on FreeBSD

Image
Setting up optical drives on FreeBSD can be very tricky and sometimes cumbersome especially buggy software. However, this guide will provide the easier way on how to setup the optical drive correctly so you can use it.   1. Put these line in /etc/devfs.conf for device permissions: link   /dev/cd0    /dev/cdrom perm   /dev/cd0    0666 perm   /dev/cdrom  0666 perm   /dev/xpt0   0666 perm   /dev/pass0  0666 own    /dev/cd0    root:operator own    /dev/cdrom  root:operator own    /dev/xpt0   root:operator own    /dev/pass0  root:operator 2. Put these lines in /etc/devfs.rules add path 'acd[0-9]\*'    mode 666 add path 'cd[0-9]\*'     mode 666 add path 'pass[0-9]\*'   mode 666 add path 'xpt[0-9]\*'    mode 666      3. Add the...